
Today, I’m sharing a basement renovation example in Markham, Toronto. See how this resident completed their basement renovation in just 3 weeks.
In this renovation, the tenant increased the living and recreational space in their home. This not only improved the quality of life, but also greatly increased the utilisation of space. The entire renovation project was completed in just 3 weeks, allowing the residents to enjoy a refreshed living experience in a short period of time.
Spatial Needs
The homeowners were eager to increase the living space in the basement. Whilst there were civic spaces such as a family room upstairs, the basement also needed a recreational area. In addition, the owner wanted to add a stairwell from the basement to the outdoor area for easy access.
After a site survey, we decided to build three new bedrooms with ensuite bathrooms and wardrobes to meet the owner’s space needs.
Duration Requirements
The timing of the basement renovation was critical for the homeowner. The owner and his family will be living in the property during the construction period. Therefore, we needed to ensure the quality of the construction and minimise the disruption to the owner’s life by keeping the construction period as short as possible.
After obtaining the construction permit, we pushed the project forward efficiently and successfully completed the construction within three weeks.
Design Requirements
The owner preferred a simple yet functional design solution with a focus on cost effectiveness. The basement was the focus of this design, including wall refinishing, flooring, and lighting updates.
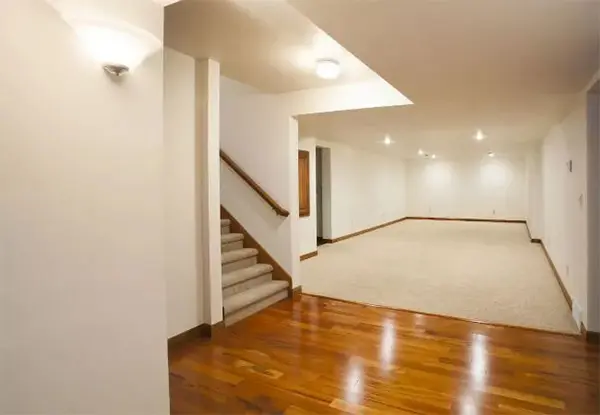
Next, let’s take a look at the old basement before renovation. The overall colour tone is warm yellow and the layout of the space is simple. Except for the bedroom and laundry room, other areas were not meticulously partitioned and planned. This provided ample room to play with for our renovation work.
Detailed Project
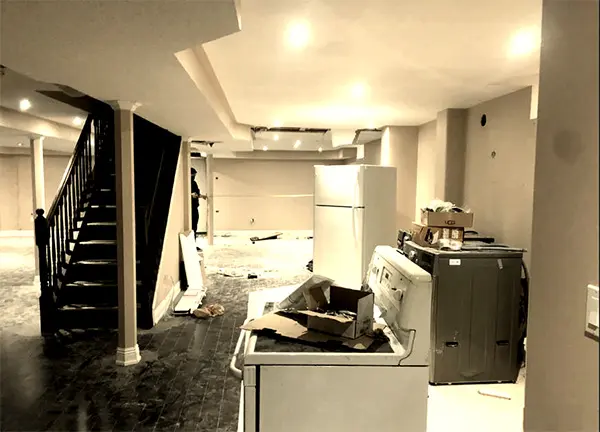
Demolition Work
The demolition work included the removal of the old flooring, original cabinets, countertops sinks and faucets. The removal of the popcorn ceiling was also carried out, as well as the removal of the waste disposal facility.
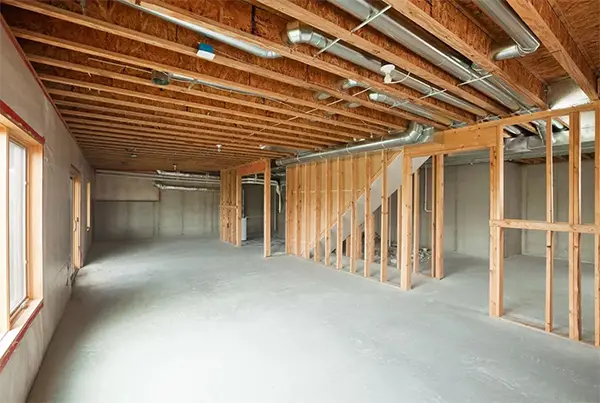
New Construction & Renovation
Three new bedrooms and bathrooms were built, circuit rebuilds were performed, and new wardrobes were installed. Also, new kitchen cabinets, countertops, sinks and faucets. Also, install shower heads, glass partition doors in the bathrooms and new wall tiling. The flooring will also need to be completely new as well as a new plaster ceiling.
Plumbing and Heating Renovation
The bathroom will need to be fitted with ancillary fittings and plumbing alterations to ensure that the heating and cooling systems in the new bedroom and bathroom are well built.
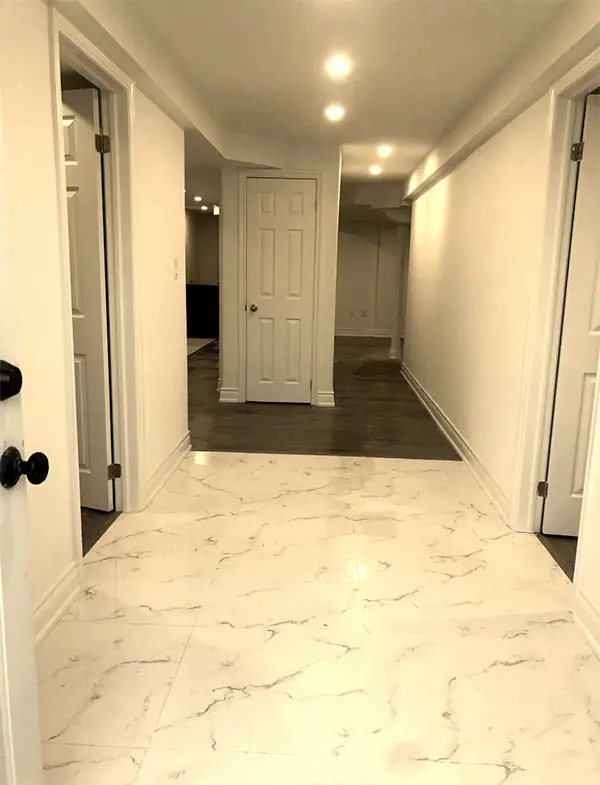
The newly renovated basement hallway is bright and spacious with an overall clean and tidy environment. The walls are freshly painted, the potlights are new and chic, the floors and tiles are new, and everything appears to be in order. The basement ensuite bathroom is newly renovated, including a threshold-less shower area, exquisite bathroom floor tiles, freshly painted walls and newly installed bathroom fixtures, giving an overall modern and stylish look.
Basement Renovation Advice
Basement renovation doesn’t start straight away when you want to renovate, you need to declare and plan first. So, what exactly should you pay attention to? Next, we’ll give you some basement renovation advice.
Get a Permit First
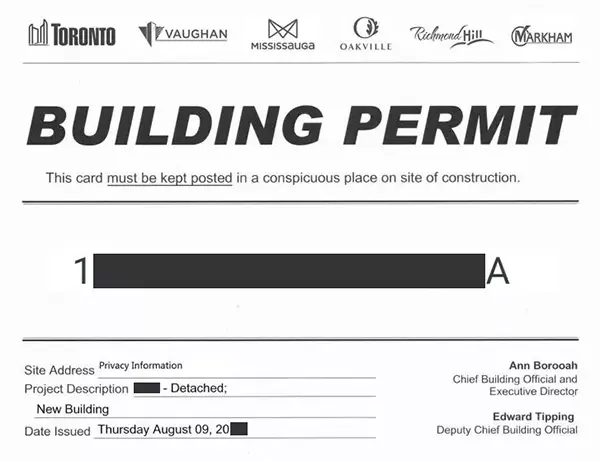
While each community has different rules for building on a home, in general, a permit is not required if you are simply sealing a wall or painting a basement wall. However, a permit may be required for adding walls within an existing concrete wall, or for wiring or plumbing in the walls.
Since you can’t see from the curb if the basement is being remodelled, some homeowners may consider skipping the permit application process. However, failing to obtain a permit can lead to many problems. If discovered by the local building department, you may not only have to pay a hefty fine, but you may also have to remove the walls of the new addition.
What’s more, failing to obtain a permit can also affect the sale of the home. When potential buyers find out that the basement doesn’t match the description in previous records, they may pass on the home.
Don’t build walls until the basement is dry
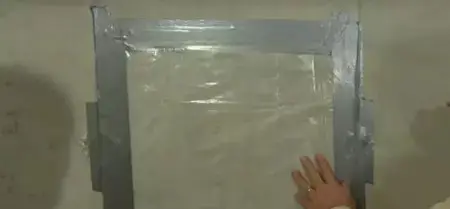
Even if there are no visible cracks in the basement walls, there is still a chance that some moisture may be present inside the walls. A simple test will help get a quick answer. Tape a one-foot-square piece of plastic wrap (cling film) to a concrete wall in your basement and leave it there for 24 hours, then remove the cling film and inspect it.
If the inside of the plastic is damp, it proves that there is moisture inside the concrete walls of the basement. If the moisture test shows moisture on the cling film but the wall is dry to the touch, the solution is simple. Simply apply a coat of gypsum board sealer, such as DRYLOK Gypsum Board Waterproofer, available from The Home Depot, to the concrete walls.
In some cases, gutters and drain extensions can be installed outdoors to keep outdoor water away from the home’s foundation and will reduce moisture in the basement.
Use building materials specifically designed for basements
It is fairly common practice to make walls out of grey board outside of the existing concrete walls in a basement. Such a project requires knowledge of construction, so many homeowners hire a professional carpenter to complete the job.
However, if you have carpentry skills and want to do the work yourself, you will need to know the local building codes and what moisture and rot resistant building materials are typically required for basements.
If the wood is in contact with a concrete wall, you will need to use treated wood. Wood that has been treated with alkaline copper quaternary (ACQ), a chemical that reduces decay. Therefore all fasteners like nails or screws should be ACQ compatible.
If wet gypsum board is used for basement walls, choose a gypsum board that is moisture and mould resistant. Insulation should be added between the concrete floor walls and the gypsum board in the basement; using foam board insulation is a good choice. This is because fibreglass wool absorbs moisture in humid conditions.
Prepare for wiring and plumbing ahead of time
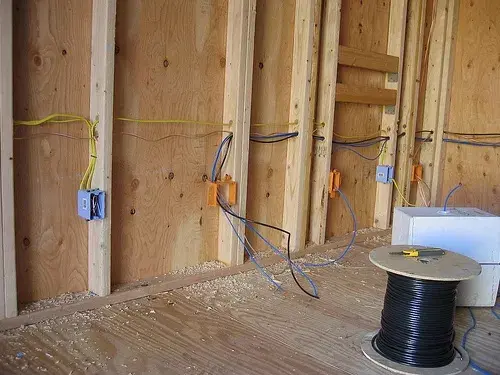
If you want to add power to the basement walls, you should know the local codes to determine how many outlets can be installed, as well as find a licensed electrician to help with the wiring as well as the installation.
For plumbing, you can add gypsum board to encase the pipes in the wall while keeping the existing pipes. For example, if there is a 3-inch drain pipe in a concrete wall, the sheetrock for the new wall should be installed 3.5 inches from the concrete wall. Although you will lose some living space, it is cheaper and easier than rearranging the pipes.
If you are adding a bedroom, don’t forget to install windows
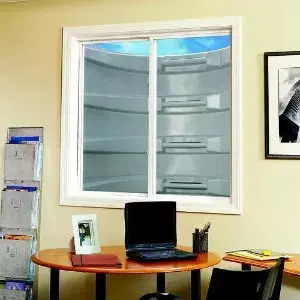
The International Residential Code (IRC) requires that escape windows be installed in all basement bedrooms. Windows should have a minimum width of 20 inches and a height of at least 24 inches. The window should have 5.7 square feet of escape space, and the bottom of the window should be no higher than 44 inches above the floor to allow for easy escape from the room in the event of a hazard.
Do not build sloped walls

The most common method of wrapping walls in basements is to build them right on the floor. However, this is not the best method. If you have an uneven concrete floor in your basement, it may result in walls that are unevenly high or low when you wrap them.
A better method is to first fix the top plate of the keel to the ceiling joists and then install the base plate to the concrete floor. Measure and cut each vertical stud individually when putting up the plasterboard. This will result in a perfectly flat wall, and although it will be a little slow, the results will certainly be satisfactory.
Basement finishing time is a factor to focus on. Proper planning and professional advice can help complete a quality basement finish in a limited amount of time. I hope these basement finishing tips are helpful.